Scavenging Missions in Dead Zone Revive
Real-time zone runs, loot rules, and extraction discipline.
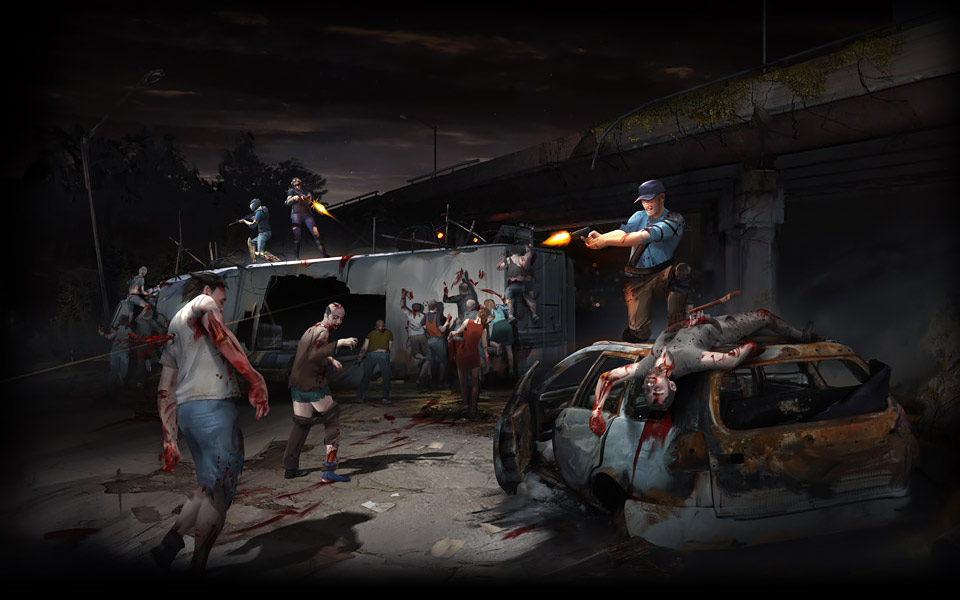
Scavenging missions are the heartbeat of Dead Zone Revive. You leave your compound, enter a real-time isometric zone, fight or evade threats, loot containers, and extract before you die or run out of time. Everything else — crafting, base defense, alliances — feeds off mission output. Ruby Realms Studios and Switch Compagnie built this loop as a not-for-profit fan revival licensed with Con Artist Games; it is free-to-play with no pay-to-win shortcuts, so mission skill is your primary progression engine.
If you have not configured inputs yet, open Controls in parallel. For your first login, start at Getting Started.
What scavenging is (and is not)
Scavenging is active gameplay, not a passive timer. You aim, reposition, manage stamina, and choose when to push deeper versus extract early.
It is not:
- A guaranteed loot pinata — death drops gear on some builds.
- Solo-only — squads share pressure but split attention.
- Separated from compound risk — overstuffed bags slow escapes; see Crafting and Loot.
Early Access caveat: mission modifiers and zone lists may expand or shift between patches. Cross-check the Updates hub when a destination disappears from your board.
Mission board basics
From compound, open the mission interface (see How to Play for UI context). Each entry typically shows:
- Zone name and theme — urban, industrial, suburban, etc.
- Threat rating — infected density, elite chance, environmental hazards.
- Objectives — optional tasks that boost rewards.
- Duration or extraction windows — some zones punish slow looting.
Use the Map wiki page to learn landmarks and extraction routes before committing consumables.
Loadout before you deploy
Never accept a mission with default gear if you have stash upgrades waiting.
Minimum loadout checklist:
- Primary weapon at current tier — consult Items for stat breakpoints.
- Backup sidearm or melee if primaries jam or break.
- Armor with balanced resist — do not stack one type because a zone has one enemy.
- Meds and food if the build uses them — Medic teams carry extra.
- Class ability synergy — Recon for intel, Scavenger for container speed.
Plan formally with the Loadout Planner once you juggle multiple survivors.
Inside the zone: phased gameplay
Most successful runs follow four phases:
Phase 1 — Entry and recon
Move inward along cover-rich paths. Note extraction direction immediately — panic runs fail when you forget which alley leads out. Recon abilities that reveal patrols pay off here.
Phase 2 — Controlled looting
Open containers along your exit vector, not away from it. Prioritize:
- Blueprints and recipe unlocks.
- High-rarity mods matching your build.
- Mission objectives tied to bonus crates.
- Bulk mats only if the Resource Checklist flags a near craft.
Skip gray clutter once you understand sell values — Beginner Tips covers bag hygiene.
Phase 3 — Combat spikes
When alerted, break line of sight, reload in cover, and use class kits:
- Fighter — hold chokepoints, do not chase into spawns.
- Leader — buff before pushing, not after half the squad is down.
- Engineer — deployables on retreat paths, not offensive deep lines.
Check Tier List for current class potency, but player skill beats tier letters in Early Access.
Phase 4 — Extraction
The loot only counts when you extract. Head out at 70–80% bag value if threat rose — perfectionists die with full inventories. Extraction points are marked on the mission map; some zones add conditional exits during events.
Squad versus solo
Solo pros: full loot rights, slower clears, simpler callouts.
Squad pros: faster kills, revive chains, role specialization from Class Overview.
Squad cons: friendly fire risk, loot arguments, waiting on stragglers.
Alliance mates from Alliances and Raiding often squad for scheduled farm routes. Pug groups need loot rules agreed in chat before entry.
Failure states and recovery
Death or failed extraction hurts:
- Lost or degraded gear on corpse depending on rules.
- Wasted consumables and time.
- Morale hit when crafting mats were mission-only.
Recovery plan:
- Re-run a lower threat zone to rebuild a baseline kit.
- Craft replacements at compound — Compound Setup ensures benches are ready.
- Analyze death cause: gear gap, map knowledge, or control issues from Controls.
Mission types players track
Names vary by patch, but categories repeat:
| Type | Focus | Wiki pairing |
|---|---|---|
| Resource runs | Bulk mats | Resource Checklist |
| Blueprint hunts | Recipe unlocks | Crafting and Loot |
| Objective missions | Bonus crates | Map landmarks |
| High-threat raids | Rare mods | Loadout Planner |
| Event zones | Limited-time drops | Updates hub |
Linking missions to base progress
Every extraction should answer: What compound upgrade does this enable?
Examples:
- Wall tier mats → Compound Setup.
- Weapon mods → Crafting and Loot.
- Alliance contracts → Alliances and Raiding.
Random loot feels endless with 30,000-plus items; goal-directed missions do not.
Advanced habits
- Route memorization — same zone weekly builds muscle memory for container clusters.
- Threat audio — horde cues differ from single elites; headphones help on Steam.
- Patch day discipline — read Updates before burning rare keys on changed zones.
- Review external impressions — Links and Review sometimes flag broken spawns early.
Scavenging is where Dead Zone Revive proves it is a revival worth keeping — not a menu simulator. Master extraction discipline and the compound becomes a trophy case instead of a repair bill.
Frequently Asked Questions
Quick answers for survivors in the Dead Zone.
Do I lose loot if I die on a scavenging mission?
Rules vary by zone and patch. Assume death risks gear on your survivor until you extract. Play conservatively until official docs clarify corpse recovery.
Which class is best for scavenging?
Scavenger speeds container looting; Fighter stabilizes combat. Medic and Leader shine in squads. See Class Overview and Tier List for current meta.
How long should a mission take?
Extract when bag value justifies risk — often fifteen to thirty minutes for mid zones. Timers and events may force faster exits.
Can I scavenging in the browser?
Yes. Browser and Steam share the mission loop. Steam may feel smoother for aim-heavy zones; Controls covers both setups.
Why did my favorite zone vanish?
Early Access rotates content. Check Updates for zone additions and removals before assuming a bug.